Running your own Spring Initializr and using it from IntelliJ IDEA
If you ever worked with Spring Boot, then you are probably aware of Spring Initializr. The Spring Initializr is a web application that you can use to create a Spring Boot application.
Do you know Spring Initializr itself is an open-source Spring Boot application? You can fork it, customize it, deploy on your infrastructure and use it to generate Spring Boot applications.
The next question would be what kind of customizations I can do? Why should I bother to host it myself?
Imagine you are working for a large enterprise organization that uses Spring Boot for building various applications. To improve developer productivity, you might have created your own spring-boot starters that provide your domain-specific functionality. Now, you may want to make those custom starters available in the Spring Initializr. This is where you can customize the Spring Initializr to make those custom starters available in the starter list. This is one of the usecase only, but you can customize other aspects of code generation as you see fit for your needs.
Let me demonstrate how you can customize the Spring Initializr to add a new dependency support. While building Spring Boot applications, I often use RestAssured for testing REST APIs. Let’s customize the Spring Initializr to add RestAssured dependency support.
Run Spring Initializer Locally
- Clone start.spring.io GitHub repository
$ git clone https://github.com/spring-io/start.spring.io.git - Build and run the application as described in the README.
$ ./mvnw clean install $ cd start-site $ ../mvnw spring-boot:run - Now you should be able to access locally running Spring Initializer at http://localhost:8080. You can generate a Spring Boot application using this local service just like you would with https://start.spring.io.
Slow Response for first requests
When you run the Spring Initializer locally and try to generate the application, for the first time it may take some time (10+ seconds). From the next time onwards, it will be faster.
Add RestAssured Dependency Support
All the dependencies(starters) that we see when we click on ADD DEPENDENCIES button are configured in the start-site/src/main/resources/application.yml file.
Now, let’s add the following RestAssured dependency configuration under Testing group after Testcontainers configuration.
...
...
- name: Testcontainers
  id: testcontainers
  description: Provide lightweight, throwaway instances of common databases, Selenium web browsers, or anything else that can run in a Docker container.
  groupId: org.testcontainers
  artifactId: junit-jupiter
  scope: test
  starter: false
  links:
    - rel: reference
      href: https://java.testcontainers.org/
- name: RestAssured
  id: rest-assured
  description: TestAssured for testing REST APIs
  groupId: io.rest-assured
  artifactId: rest-assured
  scope: test
  starter: false
  links:
    - rel: reference
      href: https://rest-assured.io/
...
...
Stop the running application and restart:
$ ../mvnw spring-boot:run
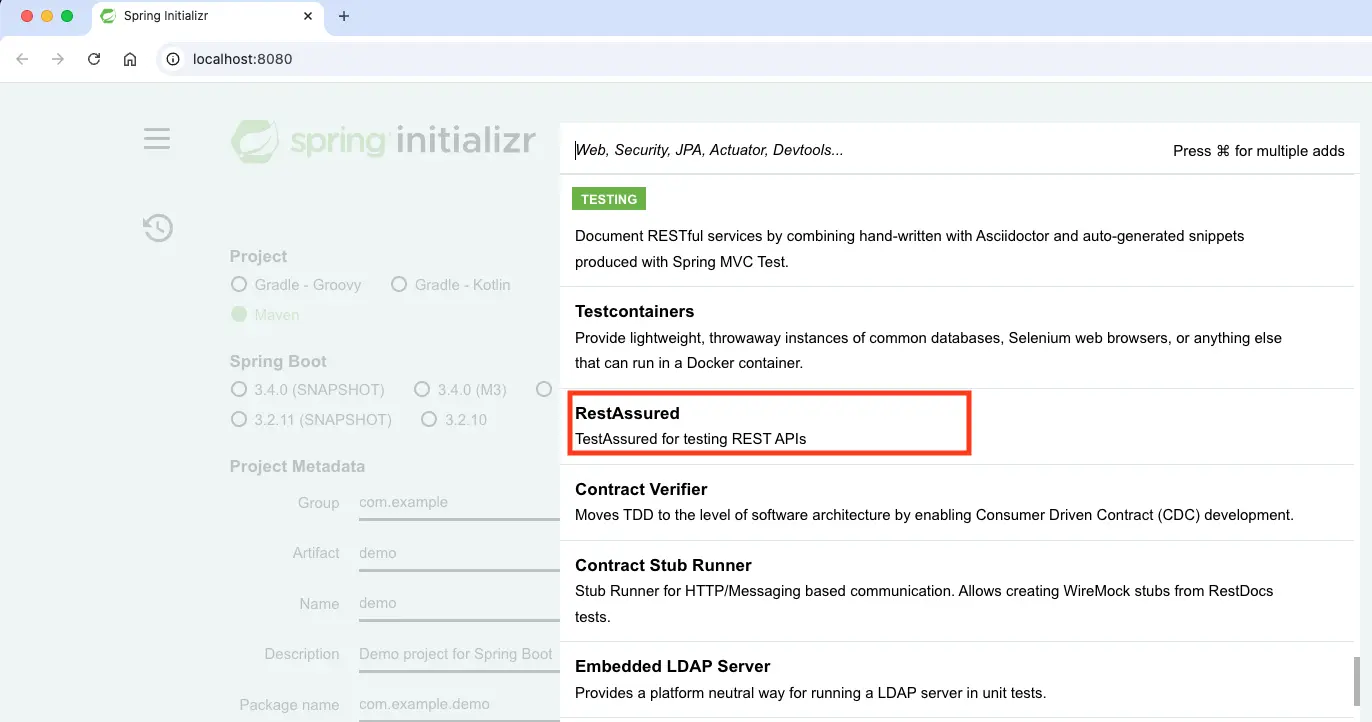
Now you should be able to see RestAssured dependency under Testing category.

Clear Browser Cache
Your browser might have cached the previous responses and doesn’t show you RestAssured dependency. From your browser, try to Empty Cache and Hard Reload.
Now, if you generate a Spring Boot application with RestAssured dependency selected, then your build file should have the RestAssured dependency added.
<!-- Maven -->
<dependency>
   <groupId>io.rest-assured</groupId>
   <artifactId>rest-assured</artifactId>
   <scope>test</scope>
</dependency>

<!-- Gradle -->
testImplementation 'io.rest-assured:rest-assured'
Using Custom Spring Initializr from IntelliJ IDEA Ultimate Edition.
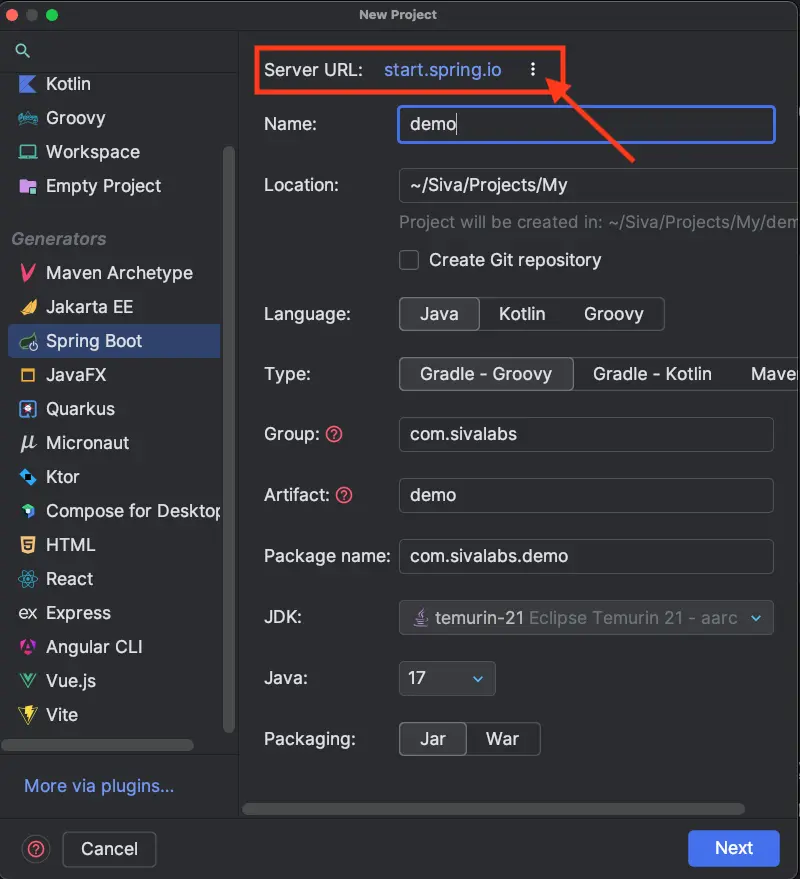
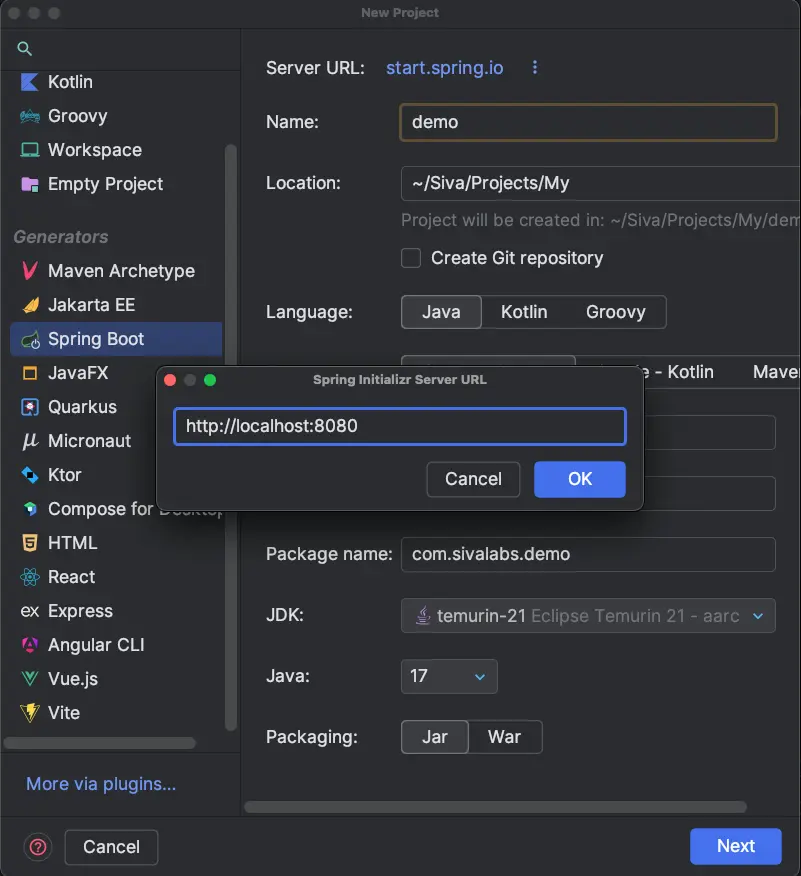
IntelliJ IDEA Ultimate Edition provides extensive support for Spring Boot including a dedicated project wizard. IntelliJ IDEA under the hood uses https://start.spring.io to create Spring Boot applications. We can customize the default Server URL to http://localhost:8080.


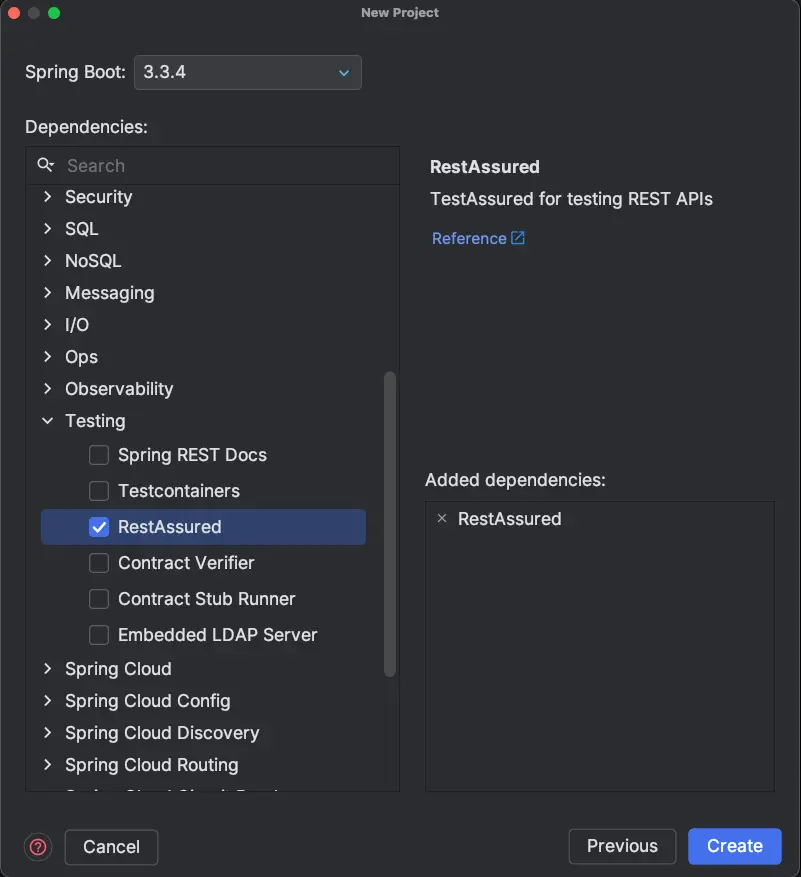
Now we should be able to see RestAssured dependency as follows:

Summary
Spring Initializr is a Spring Boot application that powers the widely used https://start.spring.io. You can customize and extend its functionality to support your needs. If your organization has custom starters, want to generate the initial application with some customizations, you can host your own Spring Initializr. You can also configure your IntelliJ IDEA to use your own custom Spring Initializr to generate Spring Boot applications.
Related content
- Mastering Spring Boot in 5 Stages
- Thymeleaf Layouts using Fragment Expressions in Spring Boot GraalVM Native Image
- Spring Boot + Testcontainers Tests at Jet Speed
- Spring Boot + jOOQ Tutorial - 5 : Fetching Many-to-Many Relationships
- Spring Boot + jOOQ Tutorial - 4 : Fetching One-to-Many Relationships